9th November, 2022 |
Blog| mykonosplan |
No Comments
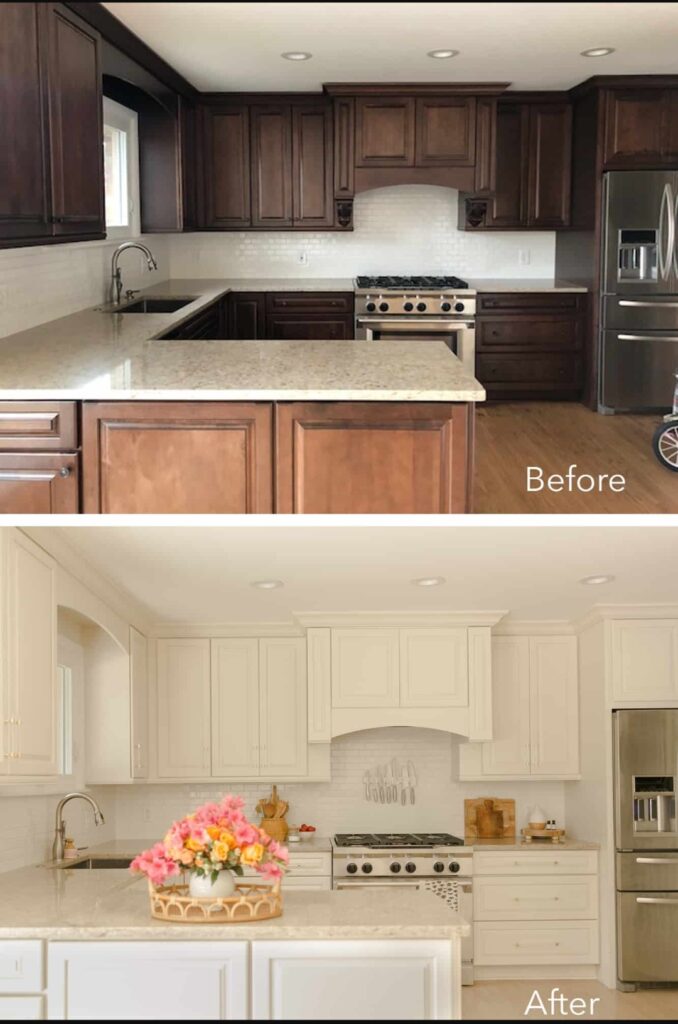
Renovating a kitchen is one of the most expensive remodeling projects that you can take on, and replacing the cabinets can account for nearly 40 percent of that cost.On the other hand, a few fresh coats of paint can go a long way toward transforming your existing cabinets for a fraction of that price.
Should I Paint My Cabinets?
Before you head out to the paint store, however, examine your cabinets to see if they can be resuscitated in the first place. Even the highest-quality paint job can’t revive cheap cabinets that have grown frail with age. Thin veneers peel or delaminate, particleboard cabinet bottoms or shelves sag or break, and hanging rails come loose. If these are the issues you’re dealing with, you’d actually be better off replacing your kitchen cabinets.
Steps For Painting Cabinets
1. Prep The Room
A successful paint job lies in diligent prep work, and the first few steps are focused on prepping the room and cabinets for painting.
Start by emptying the cabinets, clearing off the counters, and removing any freestanding appliances.
Relocate tables and other furniture to another room.
Tape rosin paper over the countertops and flooring, and, to protect the rest of the house from dust and fumes, tape plastic sheeting over the backsplash, windows, fixed appliances, and interior doorways.
Mask off the wall around the cabinets.
Set up a worktable for painting doors, drawers, and shelves.
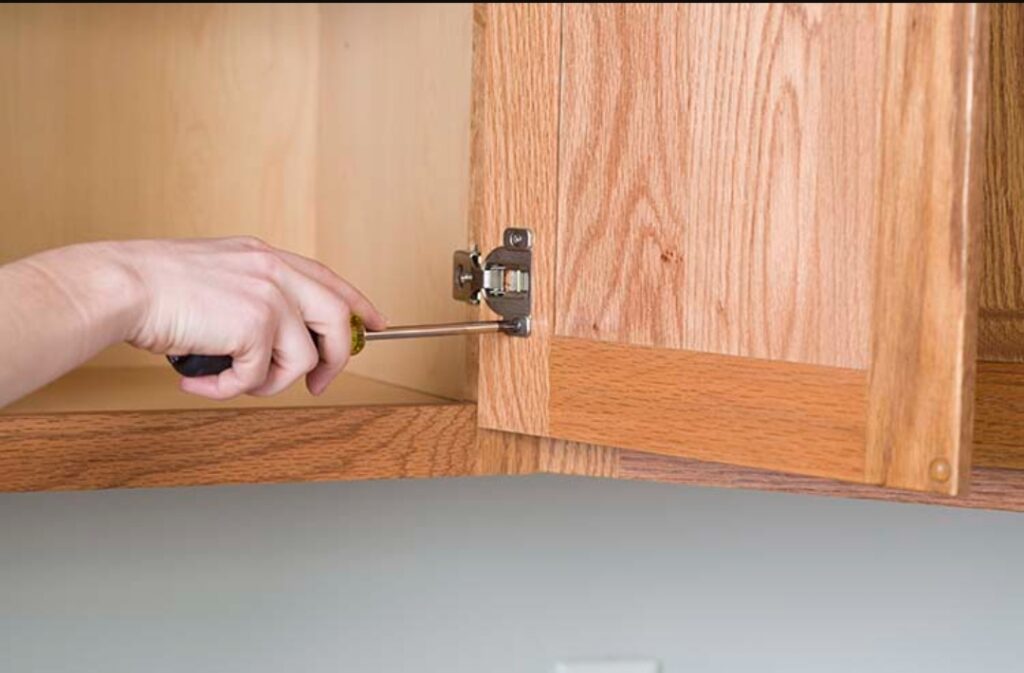
2. Remove The Doors, Drawers, And Shelves
Be sure to mark each drawer front and door with a marker to prevent mixing up the doors. The best place for this mark is behind the hinge location.
Back out the hinge screws from the cabinet frame and remove the doors.
Working from left to right, top to bottom, label each one with a numbered piece of tape. Also, number the edges of cabinet shelves and the bottoms of drawers.
Set aside the shelf-hanging hardware.
At your worktable, remove the pulls and hinges and save what’s being reused.
On the doors, transfer the number from the tape to the exposed wood under one hinge.
Cover it with fresh tape.
3. Clean All The Surfaces
Clean the cabinet by spraying it with an degreaser solution and wiping it down with a rag. This removes all the oils and grease that could prevent a perfect finish.
Once all the cabinet pieces are clean, rinse them thoroughly with water and let them dry.
4. Prep The Boxes
Open the windows for ventilation and put on safety gear. Using an abrasive pad dipped in a liquid deglosser, scrub down all of the surfaces.
Hold a rag underneath to catch drips. Before the deglosser evaporates, quickly wipe away the residue with another clean, deglosser-dampened rag.
If you’re relocating the hardware, fill the old screw holes with a two-part polyester wood or autobody filler.
It sets in about 5 minutes, so mix only small batches. The filler shrinks a bit, so overfill the holes slightly.
As soon as it sets, remove the excess with a sharp paint scraper. If it hardens completely, sand it smooth.
Use a foam sanding block to scuff the surfaces of the cabinet, drawers, and doors. This is a light sanding meant to give the primer something to adhere to, so don’t sand to the bare wood. Use a tack cloth to remove the sanding dust before moving on.
Vacuum the cabinets inside and out to make sure no bits of dust mar the finish, then rub them down with a tack cloth for extra measure.
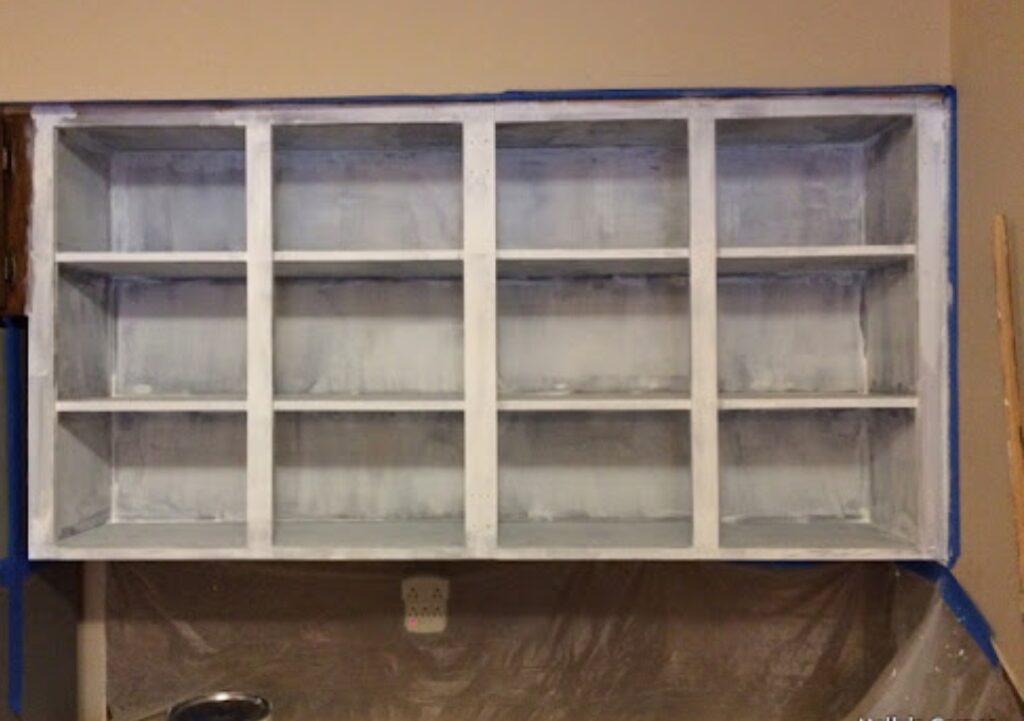
5. Prime The Cabinet Boxes
Pour some primer into the paint tray and load the roller and brush. Using the brush along the edges and tight spots, and the roller on the large, flat surfaces, coat the cabinet, doors, and drawer fronts with a coat of primer.
Starting at the top of the cabinet, brush on the primer across the grain, then “tip-off”—pass the brush lightly over the wet finish in the direction of the grain. Always tip-off in a single stroke from one end to the other.
Make sure to follow the underlying structure of the cabinet or door with the brush. Where a rail butts into a stile, for instance, paint the rail first, overlapping slightly onto the stile, then paint the stile before the overlap dries.
While you’re allowing the primer to dry, wash your brush and roller sleeve pour the excess primer back into the can before washing the paint tray.
6. Sand, Caulk, And Fill
After the primer is dry, sand the flat surfaces with 220-grit paper.
Sand any profiled surfaces with a medium-grit sanding sponge. The wood should end up feeling glass-smooth.
Squeeze a thin bead of latex caulk into any open seams. (The hole in a caulk tube’s tip should be no bigger than the tip of a sharp pencil.)
Pull the tip as you go, then smooth the caulk with a damp finger. Fill any small dents, scratches, or dings with vinyl spackle, smoothed flat with a putty knife.
Once the spackle is dry (about 60 minutes), sand again with 220-grit paper, vacuum, and wipe with a tack cloth.
With a spray can of fast-drying oil-based primer, spot-prime the spackle and any spots where the sandpaper has “burned through” the primer.
Wait an hour, then sand the primer lightly with 280-grit paper.
Vacuum all the surfaces, and wipe them with a tack cloth.
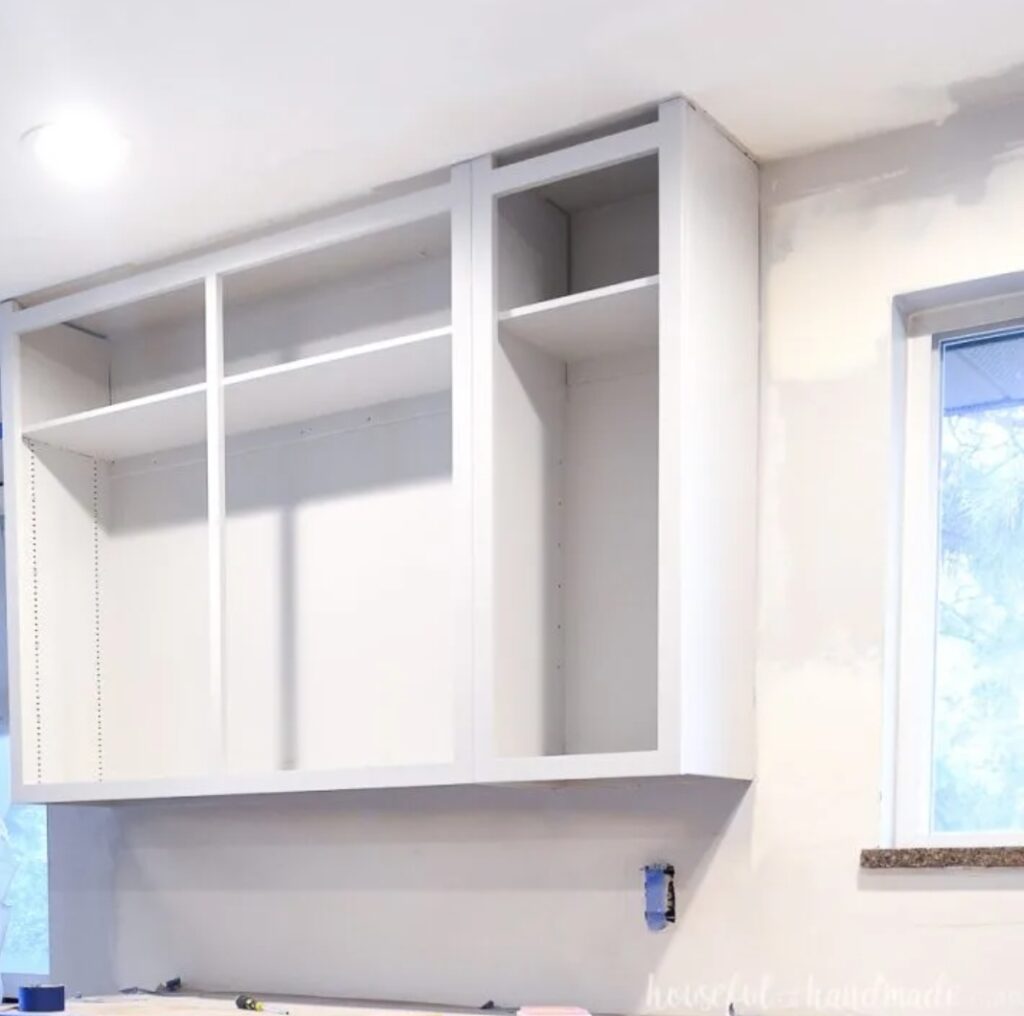
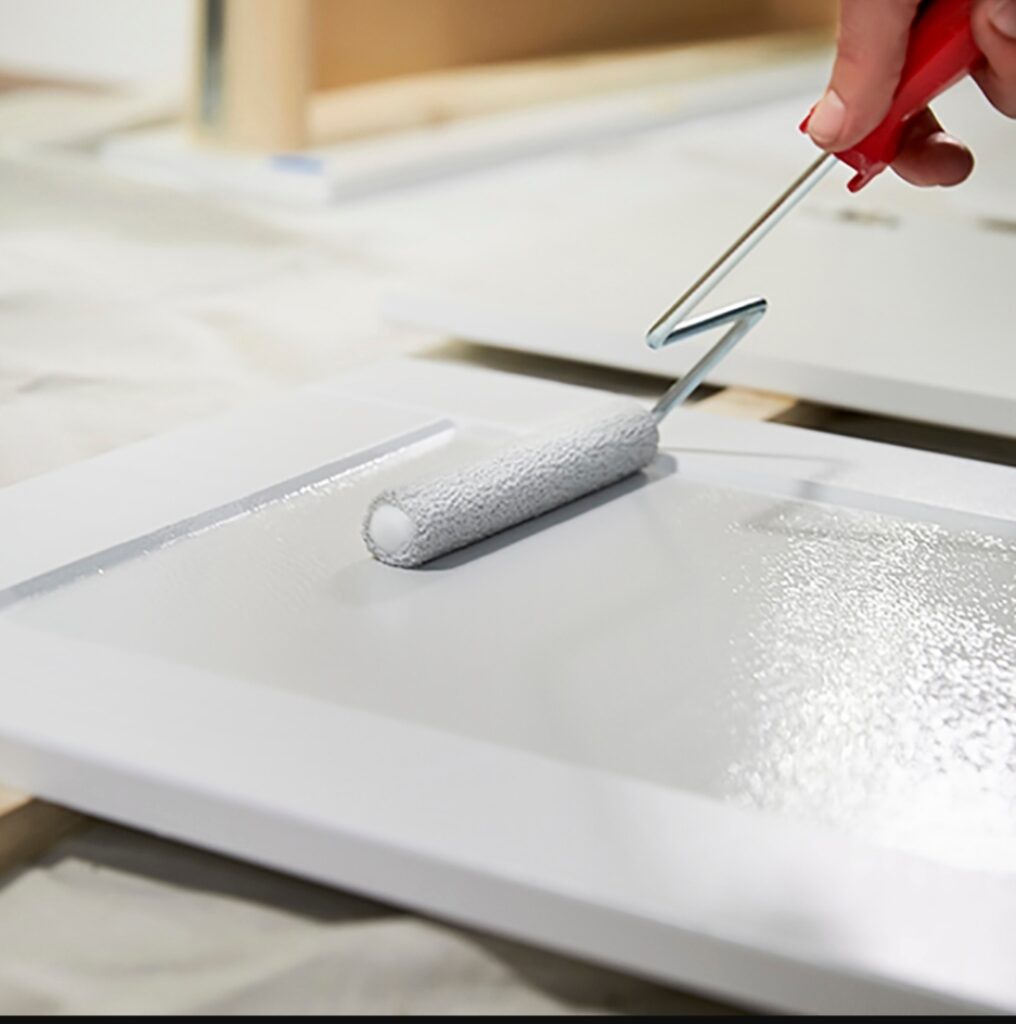
7. Paint The Cabinet Boxes
Pour some trim and cabinet enamel paint into the paint tray and load the brush and roller with paint. Use the brush to cut in along the edges, push the paint into the corners, and leave out roller strokes. Use the roller to apply enamel paint to the large flat surface where possible.
For the cabinet interior, apply the paint with a smooth-surface mini roller, which leaves a slightly bumpy, orange-peel texture.
Cover the brush and roller with plastic bags to prevent them from hardening while you wait for the first coat to dry.
Between coats, sand the surfaces lightly, making sure to clean up the debris afterward.
Apply a second coat to the cabinet. This coat should provide a perfect, consistent finish without any thin or light areas where wood might show through.
8. Prep, Prime, And Paint The Doors, Drawers, And Shelves
When painting paneled doors, start with the area around the panel.
Then, do the main field of the panel, and finish with the stiles and rails around the edges.
As you go along, wipe up any paint that ends up on adjacent dry surfaces to eliminate the chance of lap marks.
When you’re done painting, pick up the door by the screw and one hook and hang both hooks on a sturdy clothes hanger.
Suspend the door from a shower curtain rod or clothes rod until it dries.
9. Put Back All The Pieces
Once the second coat dries, reattach the door and drawer fronts. Enjoy the fact that you’ve given your kitchen cabinets a fresh new look without investing a lot of time or money.
Remove the tape over each door’s number, install the hinges and knob, and hang them in their original opening.
Replace the drawer pulls (or add new ones) and reinstall each drawer.
Mykonos Proffesional Painting Recommendation
If you want to paint your kitchen cabinets professionally to make them look like new Contact Us. Mykonosplan is the best painting company in Mykonos.
11th December, 2022 |
Blog| mykonosplan |
No Comments
What Is Dampness?
Dampness in building may occur due to bad design, faulty construction and use of poor quality of materials. Dampness not only affects the life of the building but also creates un...
10th December, 2022 |
Blog| mykonosplan |
No Comments
Pavers are flat surfaces that are typically made of concrete, natural stone, and brick.
Property owners install pavers to elevate the functionality and aesthetics of their driveway. The materials ...